Showing posts with label Embroidery. Show all posts

Sunday, August 17, 2025

A new embroidery project...

Wanting a break from my Manx squares, but still desiring to work with fabric and floss, I decided to give in to the desire to embroider something.  

Perusing library books lately, I've come across some fun embroidery ideas.  Embroider Your Life is more of an inspiration than it is a project book.  But it also provides some fun designs the reader can use.


Seeing a whimsical fox pillow in the above book, I decided that's what I'd do.  

I had to enlarge the small pattern in the book by about 250% before it was large enough for even a small pillow.


Taped to a window, I was able to trace the outline and some directional markings onto a natural colored homespun fabric.  


And, of course, before tracing with a heat-erasable pen, I didn't take into consideration that I'd want this whole thing to be stabilized in some way. The obvious choice (to me) would have been fusible (iron-on) interfacing or stabilizer, but I did not want a hot iron erasing all the tracing I'd just done!  

Sigh.  Okay...  what to do?

Looking through my stash of materials I found some nice felt I'd purchased for a different kind of embroidery. 

Hmmm...  well, why not? I'd bought it for embroidery backing.  I didn't imagine using it for such a large piece.  But it should work. 

Right? 

For something that will be sewn into a pillow?  You think?

I decided to go for it.

So, I machine-basted the homespun to the felt.  While the thickness of the felt causes it to be a little more effort to pull the needle and floss through, I'm thinking it's going to make a nice smooth finish to this piece when I sew it all together and stuff it into a pillow.


Finally, with that decision made, I was ready to start stitching!  


In the book, the whole fox image was filled with running stitches on a white fabric, but because I'm using beige fabric, I thought it would look better if I embroidered the fox's white chin, throat and belly with long and short filling stiches that would cover the space better than a simple running stitch does.  And it's kind of fun that it looks a bit like fur...


That said... in retrospect, it seems a bit silly that I thought creating a filled-in effect was important to do on the underside of the fox, while the rest of his fur is depicted with running stitches.  But I'm going to finish what I began - even if it takes two or three times as long to fill the fox's underside as it would have if I'd simply done the whole thing in running stitches.  Who knows... maybe I'll find the two different ways of filling open space in the design adds to the whimsical factor.

Hopefully, we'll find out soon that it does!


Sunday, November 17, 2024

Cross stitch...

My colorful Dahlia blanket continues to grow and one of these days (or weeks) I look forward to showing it in its finished state. Until then, even though it's growing, a picture of it today would look pretty much like a picture of it a couple of weeks ago, so I'll not bother with progress pictures.

Thinking a little crafting variety might be nice, I went through some embroidery supplies and cross stitch projects recently, and I decided it was time to put some effort into finishing a small stitch I began before moving in 2021 - honestly, I think I started this during the early covid days of 2020:


There is another (finished) companion stitch on the other half of this fabric, so I look forward to soon sewing them both into small pillows. 

While I had my flosses out, it occurred to me that some might be interested in how I store these threads.  My system is nothing novel, but I like it because it's easy to keep neat.

I like to wind DMC floss skeins that I'm using onto cardboard bobbins.  Once finished with a project, the bobbins go into a divided plastic storage box:

I have another (empty) box like this waiting in the wings.  By the looks of the picture above, it appears I'm soon going to need to employ it.

I file the colors by number so they are simple to find.  I know some stitchers don't like using bobbins like this because they create folds in the floss (especially floss wound closer to the bobbin), but I've never found that to be problematic. I find that the floss tends to straighten out while stitching, and it doesn't affect how the floss looks in a stitched project.  And being able to find any color I want at a glance makes this an ideal storage solution for me.

That said, until I actually begin to use a skein of floss, I store it with other unused skeins with their bands on them, in zip lock bags, like this:


Again, I store them according to their numbers.  The flosses stay neat in these bags, and the numbers are always visible.  I don't have to handle the floss until I locate the right color.  Then I just reach my fingers in and retrieve the single skein I need.  All the other skeins stay in place.

And these bags are stored in a small-ish plastic tote:

You can't see the hand-dyed flosses, but I have a few on rings underneath the bagged flosses in this same box.  It's more floss than I need to own, but keeping it all in this one tote makes it feel like a manageable and respectable amount.   

While I had everything out, I also decided to pull flosses for another project that I'll try to work on this winter:


I doubt I'll finish it in time to display it this December, but I'll enjoy stitching on it in the upcoming weeks.

The flosses above are hand-dyed yarns like I mentioned above.  I don't have a large collection of these embroidery flosses, but they are interesting for their subtle variegation.  And fun to use on hand-dyed cross stitching cloth.

And that is a glimpse into my embroidery storage and prep. Hopefully, something will show up finished here soon!


Sunday, January 5, 2020

Birds of a feather...

Putting up a new calendar this past week, and getting my craft room straightened after pulling stuff out the week before, I was finally inspired  start on a new cross stitch project I'd been wanting to begin.

After seeing a beautiful Mocking Bird  cross stitched by Sandy (at Home Ec Major) I went looking for the pattern and found Crossed Wing Collection - and their ooh, so many lovely bird designs. Thinking at first that the website might be old, I did a search on Ebay for the patterns and found an amazing deal for a whole slew of bird patterns and didn't waste any time bidding on them.   

BUT, let it be known...  the designers did quickly contact me to tell me their website is indeed current and they suggested if I wanted to place an order it actually works really well to call them.  I'm offering that as a bit of an advertisement for them.  The patterns I bought are very nicely done.   On heavy paper (some are on cardstock), and most of the patterns don't appear to be nearly as difficult as the pictures of their lovely designs might lead one to believe they are.  And on top of all that, they're very reasonably priced!  Between $5 and $7 dollars for beautifully detailed patterns.  Most come in sets with several bird designs.

Okay, so now you've got the information you need for making your own if you're so inclined.  

Here is the start on my first one (the background looks white in the picture, but it's actually Confederate Gray Aida cloth - purchased from 123 Stitch):


I know... I've only just begun and it doesn't look like much, but I thought it would be fun to show its progress as I work on it.  

While I'm not going to show the finished picture (that comes with the pattern) I will tell you this is a Blue Gray Gnatcatcher.  Are you familiar with that bird?  I'm truly curious because I'd never heard of it.  But it looked like a fairly simple pattern to start with, so I'm getting to know this  feathered creature.  Those are tail feathers sticking up and the blue stitches are the beginning of the body.  Stay tuned!  More to come.

I thought I'd also mention... before starting the Blue-Gray Gnatcatcher, I finished stitching a small Christmas ornament I'd started working on in the recent past:  


This is one of three Prairie Schooler Christmas ornament patterns from vintage (1980's) Just CrossStitch magazines.

I've also got a colonial house ornament pattern kitted up to go with the three of these I've already now made.  I may work on that soon, too.

~~~~~

Something else I thought might be interesting to show today...

Last summer I finished some embroidered and crochet-trimmed pillowcases.  I was asked if they were for show, and I said no - that they were for my everyday use.  Well, it's right around the 6-month mark of when I made the pair and I have used the same pillowcase in all this time, washing it with the other bed linens at least weekly (sometimes more often - when hubs or I are sick I often wash the linens every day until the sicky starts to get better).  I wash my sheets and pillowcases on a super hot sanitizing cycle in my front loading washing machine, and have machine or line-dried them at least weekly over the last 6 months.  

Just so you can see how well the embroidery and edging hold up, here is a picture of an unused one (on top) and the heavily used one (on bottom):


Right next to each other one can tell there has been some fading on the bottom one, but seriously...  using it every night I couldn't tell it had faded at all - until I put the unused one next to it.  Considering the heavy use it's gotten (including over 30 washings in super hot water) I'm really pleased at how well the edging and embroidery have held up.

To give a thorough review...  the pillowcase itself is starting to thin,  Again, I couldn't tell that when only looking at just the one.  But side-by-side I can see that the one I've been using is thinning.  It's a polyester/cotton blend pillowcase from a kit - I know it wasn't as sturdy as some of our other pillowcases bought in sheet sets.   I plan to keep on using this until it shows some obvious wear.   I may give another report at that time.  

I'm so glad I did this little experiment.  I knew that the ones I received as a newlywed held up a nice long time, but they weren't abused like I'm (sort of) abusing this one.  Seeing how well the embroidery and edging hold up, I'm looking forward to making some more someday.  I also look forward to trying out a stabilizer on the back of the next ones I make - just to see what difference that might make.  That may be my next experiment.  😉


To see what other YOPpers are up to, 
visit their blogs in my sidebar. 👉


Sunday, October 6, 2019

A full, happy week...

Is was a good week, last.  In addition to cleaning up from a big house project and bringing hubby's study more or less together (there will be pictures someday), I was able to reclaim my "yarn room".   I put "yarn room" in quotation marks because ultimately I really don't want to have a room devoted to yarn, but for the time being that's mainly the purpose it's serving.  

Eventually, I hope I can turn it into a room that reflects my interests and will contain the stuff involved in pursuing those interests (which is far more than just yarn).  I could call it my study, I suppose, but at the moment it's still undeniably...  a yarn room.  But now with plenty of room for sorting and figuring things out.  😊


~~~~~

A week or so ago a friend asked me if I would teach her young daughter the rudiments of embroidery (this toward her earning an American Heritage Girls badge).   Having plenty of supplies, I went looking for some free designs online for embroidery samplers.  For a very first project I settled on this sweet little beginner Heart Sampler.

Last weekend, after picking out our colors for our respective samplers we all set to work:


My young friend was a very quick study and it was a fun couple of hours of stitching together.  Hopefully, we'll get together soon to finish off what we started, or if she completes her first sampler on her own, maybe we could begin another!  What a pleasure it was to see a little one so engrossed in a new hobby.  She's a natural.  😊


~~~~~

And then this weekend saw the long-awaited arrival of old friends from Michigan.  On Friday night, we enjoyed catching up, and on Saturday the men went their way and the ladies theirs.  We gals ended up in Indianapolis at the Mass Avenue Knit Shop.   

Over the years since I've become a yarn hoarder collector, I've driven by this shop a number of times - early on I drove right past it because I couldn't find it, and later - after I had a general idea of where it was - it just never seemed to be on my agenda when I was in the area.  So I'd never before stopped and shopped there.  This time it was our mission to find it and check it out.  

While it's a totally unassuming place on the outside (I regret I didn't get a picture), inside it seemed HUGE to me!   I was slightly overwhelmed by the size of the space and the number of people who were there (they were having a weekend retreat), but the owner, Susan I believe is her name, greeted us warmly and explained the layout of the yarns and where to find whatever we might be looking for.  


After wandering around for a while, looking at and squishing yarn, I found what I think might be perfect yarn for making a Doris Shawl (I was gifted the pattern a couple of years ago). 

An employee, Susie, wound my yarn into cakes on this beautiful vertical yarn swift that, I believe she said, is made by a local wood worker.  With her permission I'm posting these pictures:


What a lovely finished, heirloom-quality swift.  

And my pretty caked yarn:


~~~~~

Then late Saturday afternoon we girls met all the menfolk for a birthday/retirement celebration dinner at The Bosphorus in southern Indy. 


For the first half hour or so we practically had the place to ourselves, but during normal meal hours, this is a bustling place that serves delicious Turkish food.  Anytime, it seems, the atmosphere is casual and friendly.  


While middle son (on the right) insisted on being a goob as I tried to shoot a picture, and while I'm hoping someone has a good picture of the birthday boy (the fuzzy one on the left), this is the best I can do at the moment for a picture of my three sons.  I'm a blessed mom with these three.
~~~~~

And late this morning, we said goodbye to our friends as they headed back to Michigan.  The let down was greatly felt as we waved goodbye from our front porch and they drove off in the rain.  😔 

I'm now in my quiet, getting-ever-more-orderly house.  Hubby headed north a little bit ago to his mom's to see if he can be of some help organizing paperwork this evening and tomorrow.  

Maybe I'll manage to make some more progress on my "yarn room"! 👍


Sunday, May 12, 2019

My first pillowcases are finished!

After pulling out my floss and various unfinished projects last week I set my mind to finishing up the pillowcases that I had started...I don't even remember when.  Well over a year ago, I'm sure.  

It's a similar pattern to something I remember embroidering when I was young and once I got back to them I enjoyed the nostalgia factor as I worked on them.  I'm so happy with how they turned out.
These pillowcases had a serged edge and attaching a crocheted border to them is done differently from how one would attach a crocheted border to say, a deeply hemmed pillowcase.  I referred to this example to get me started, but then created my own lacey crocheted edging.  I've written down the pattern for the border and have shared it below. 

I found it helpful to have a mark at each spot where I needed to punch through the fabric with a crochet hook to make the single crochet base.  I found this Dritz Marking Pen at Walmart and it worked great:
You can barely see the small dots I made on the fabric, but I think the picture shows what I did with the marker.  And the disappearing ink truly does disappear within about 24 hours.  

Let me say, even though my little marks were uneven in relationship to the edge of the pillowcase, they still were very helpful in my keeping some consistency in where I made these stitches.  That said, I'm not sure how important true consistency is when doing this foundation row.   It's just not the part that anyone is likely to focus on once there is a pretty border to look at.

So here's the pattern I created: 

Simple Crochet Pillowcase Border


The following stitches were used:
chain (ch) 
slip stitch (sl st) 
single crochet (sc) 
double crochet (dc) 
picot (sc, chain 3, sc into the front/bottom of original sc, sc)
Rnd 1: Using a 1.0 mm (or smaller) steel hook (to punch through the fabric), crochet sc’s all around the edge of a pillowcase that has been serged or rolled and hemmed. Join first sc with a sl st.
At this point I changed to a size 1.5 mm hook (because it’s easier to crochet size 10 thread with).
Rnd 2: Ch 3, dc into same first stitch (this creates a “v” shape); skip next 2 stitches; *dc, ch-1, dc in next stitch, skip next 2 stitches*; repeat * to * around and join to top of beginning ch-3 with sl st. If fudging is required, so be it. It will not show.
Rnd 3: Sl st to first ch-1 space. Ch 1, *picot into ch space; 5 dc’s in next ch-1 space*. Repeat * to * around. Join to first sc with sl st. Again, if fudging is required it won’t show once the pillowcase is finished, and definitely won't be obvious once it is laundered.

~~~~

Some things I feel are worth noting:   

My pillowcase was a blend of polyester and cotton.  So I did not expect it to shrink much at all when laundering it.  The thread I used to crochet the edging was 100% cotton.  I did expect it to shrink somewhat.  

As I crocheted the edging, it produced a little bit of flare.  One way to minimize that was to skip three (instead of 2) stitches occasionally in Rnd 2.  But mostly I decided to not worry about it and trust that the process of machine washing and drying would shrink the cotton thread a bit and the flare would reduce.  And it did.  Perfectly, I thought.  

So my thoughts about this (if using 100% cotton thread and a synthetic/cotton blend pillowcase):  a fair amount of flare is acceptable, but if it gets too ruffly, adjustments should be made while crocheting to tone it down a bit (unless you like a ruffly edge, of course).  It's all subjective, but I hope mentioning this helps someone else not to worry about it much if they give this crocheted edging a try and they see it start to flare out.  

If you work with acrylic yarn or a 100% cotton pillowcase you'll have different issues of shrinkage.  Just be aware of what you're working with it and accommodate it.  
Please let me know if the pattern written above doesn't make sense anywhere.  I think this may be the first time I've tried to write a pattern down.

And that's all there is to it.  The first round of sc's (punching the hook through the fabric) was the hardest part - and I'll make no bones about it, it was tedious.  But after that round it was kind of fun.

And I just love how it turned out!


To see what other YOPers are up to 


And finally...

I hope all who celebrated had a 

Happy Mother's Day!


Sunday, May 5, 2019

Show and tell on myself...

This is the post that almost wasn't.

Last week started out with such great intentions.   

And it ended with not much to show for it.  😟

Enthused about the Stitch Mayniacs starting new cross stitch projects this month and me sort of thinking I would follow along and maybe even join in, I went to pull out my embroidery floss and Aida cloth to see what I had to work with.

I found this small plastic tote box with a number of projects I had started (some decades ago) and never finished:

As I began pulling them out, I thought, why on earth am I thinking of starting new projects when I have all these that really ought to just be given some love and get finished already.


~~~~~

In no particular order, I found all sorts of things..


These pretty little strawberries are actually finished.  I think I've decided to make a small pillow (maybe a pincushion) with this. I just need to find some coordinating fabric.  So, while I don't want you to hold me to it, it is certainly within the realm of possibility that this might get finished sometime in the next decade...


~~~~~

These little Amish children have been finished and hiding away in this box for a while now.  The date I stitched on it is 1985.  For the record, that was...  a loooong time ago.  I'm not into decorating with Amish children anymore, but it seems a shame to not do something with this.  A sofa pillow, maybe (fencing the picture in with strips like a quilt)?   I'll need to find more coordinating fabric...


~~~~~
Okay, now this is interesting...
I know this project is at least 20 years old - maybe 30.  I bought this kit once upon a time thinking it  a great idea to embroider an angel tree-topper.  She has a whole dress and wings. And a halo!   Every single piece has embroidery work to do, and then it all gets stitched together with the skirt left open at the bottom so it sits atop a Christmas tree.  


I was so eager and full of optimism when I started her.
This is all I got done.  Sigh...


~~~~~

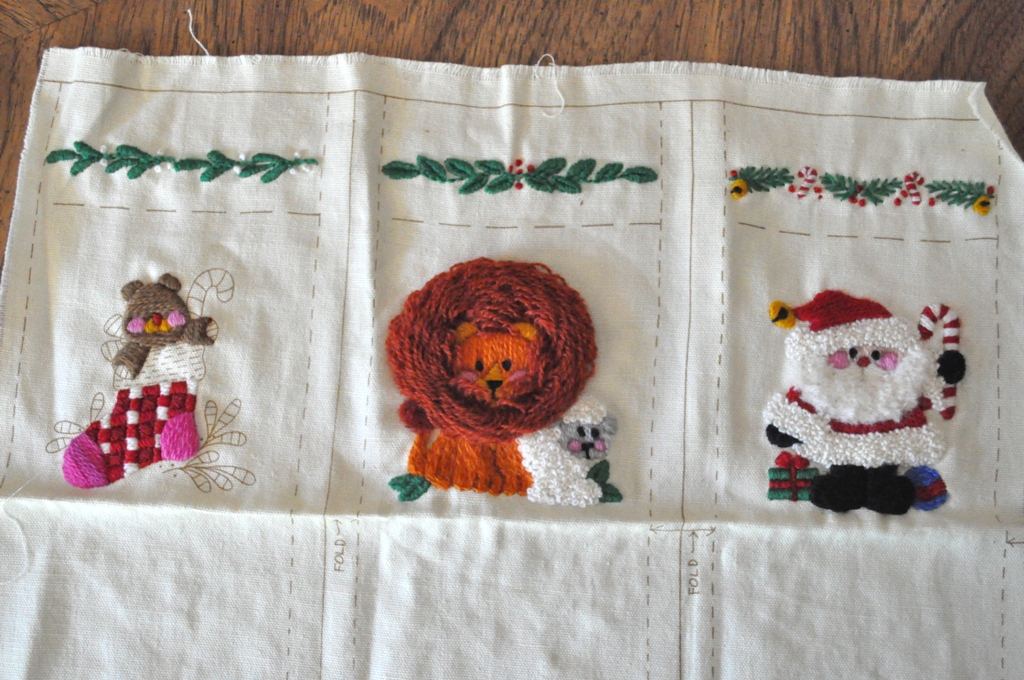
These cute little Christmas bags are all done except for some detail work on the Stocking one.  I actually finished one of these (meaning I turned it into a sachet and have used it for many years as a Christmas ornament).  The finished one is a partridge in a pear tree.  It's in the attic with the other Christmas decorations or I'd have taken a picture of it, too.  I mention it just in case anyone is beginning to doubt I am capable of finishing stuff like this.


~~~~

And before we put Christmas away, here are some ornaments I started once upon a time:
I made a bunch of these - I'm sure also more than 20 years ago.  At the time, I gave several away as small gifts to family members.  I think last Christmas my MIL (who is a quilter) returned the ones I gave her - when she began downsizing her Christmas ornaments.  I think my MIL being a quilter is the whole reason I even started making these way back then...


~~~~~

And this little bookmark I've shown here before (I'm thinking... 3... 4? years ago):
Seriously, I ought to be able to finish this in a couple of hours - including hemming, or stitching up the sides and fraying them.  Fray or hem...  which should I do here?


~~~~~

And there are the truly guilt-inducing items:
Never fear - I didn't spill anything on this.  The photo is pixelated where personal info was stitched.

This sweet little sampler above was for my middle son.  It was to go on his nursery wall.  He turned 27 in February.  I'm now saving it for my first grandchild (being the optimist that I am), and will only feel a little regret when I rip the original name and date out.  

FWIW, those two needles were in this when I unfolded it.  Let's assume I worked on this after my son was born - for at least a year or two.  That means those needles have been stuck in that fabric for at least 25 years!  

FWIW, every project that wasn't finished had a needle left in it.  Most threaded with floss or wool.  Ready to pick up where I left off, I guess...

And I wonder why I can never find a needle when I need one.

~~~~~

And finally...  I believe I made this last one around 1988-89.  I was into sheep then, too.  Amish children and sheep.  In fact, I liked sheep so much I decorated my first born's nursery with sheep and this was meant to be a pillow for his nursery.  He turned 30 last month.
I think it would make a nice pillow, still.  Since we're overdue for getting some new furniture, though, I think it ought to be tucked away until I know what color of fabric(s) I ought to trim it out with.   As always, I'm open to suggestions...


~~~~~

So what did I actually accomplish this week?  Well, if you think I got sidetracked pulling out all my finished-but-not-finished, and partially-finished needle projects, you would be correct.  But at least I did something with floss and needle.

I started back up on my simple embroidered pillowcases and I am determined to get these finished!

 
And I plan to trim them out with some simple crocheted edging like this, I think:

Aren't those swans pretty in their simplicity?   I think this is from a set of pillowcases my husband's grandmother embroidered for us 39 years ago.   That, or my grandmother embroidered them and that would make them at least 56 years old (because she died when I was just 4).  Either way, the pillow cases are not usable anymore, but they inspire me to want to make more so I hang onto them as a reminder of how sweet it was to sleep on pretty pillows.  Once I finish some myself, I think I can let the old, tattered ones go.

~~~~~
Oh yes...   And I got a little crocheting in, too.   I began a Bertie Baby Blanket.  Here's just a peek:


To see what other YOPers are up to, 

And if you're at all inclined to join us when we begin a new year on July 1st, please do!  While everyone is a knitter and/or crocheter, other crafts are highlighted, too.  All you need is a blog and to be a member of Ravelry (membership is free)!  Come check us out and see if this Year Of Projects thing looks like fun.