Showing posts with label Recipes. Show all posts

Wednesday, April 8, 2026

Beef Stew...

For some reason, while soups and stews strike me as winter fare, I rarely make them in the winter, but often find myself making several different soups in the spring, and even summer.  And Beef Stew is no exception.  Having recently made it, I decided I needed to put the recipe here so I don't lose it.  

Last week I was taking a meal to someone recovering from hand surgery and stew seemed an obvious choice since she would be temporarily one-handed.  Then I found out that this person was on a no-added-salt diet.  Eeek.

I was a little worried about how to make this stew tasty without salt.  But the recipient was thrilled with the idea of beef stew, and since I was able to find no-salt beef broth (which was actually low-salt, but the recipient said it was okay) I figured Beef Stew was probably the easiest of recipes to adapt in this way.  I bravely plunged ahead.  

The written recipe below is made the way we enjoy it, but below the recipe, I've written any adaptations (both to the original recipe I have used as a template, and to my version). 

Truthfully, I don't measure much, but simply add things to taste.  I also tend to make my batches of soup larger by adding more of the ingredients, and for that reason, the measurements listed in the recipe seem pretty sparse to me.  So...  either follow the written recipe exactly, and you can always add more seasonings, or just consider the measurements below (that were pulled  from the original recipe) as suggestions.  Just know, if you cook like me, you may find yourself wanting more or less of anything.  If you cook like me, you're probably already planning how you will tweak the recipe.


Beef Stew

2 lbs stewing meat (I never measure, but these days I just put in as much meat as I can justify spending money on.  Truthfully, I'm sure I've always used at least 2 lbs of cut-up chuck steak, or stew meat.  Beef is the point, afterall.)
1-3 garlic cloves, minced (or 1/2 tsp garlic powder)
1/2 tsp salt
1/2 teaspoon black pepper (I used freshly ground pepper)
3 Tbs olive oil (or avocado oil)
1 onion chopped
At least 6 cups beef broth (I usually use two complete containers of beef broth, so that's typically 8 cups.  Save back 1 cup for the thickening step.)
1 lb of potatoes, peeled and cut into largish chunks
4 carrots (I probably use 6) cut into chunky pieces
1 tsp dried rosemary  (if you're fancy, use a fresh sprig - I assume you fish it out later?)
2 Tbs cornstarch
3/4 cup peas (or half of a small frozen package)
Lastly, I tend to drop in a beef bouillon cube at some point.  (Taste before you do this, though.)

Heat oil in a pan or pot and cook beef and onions until browned (I add onions and minced garlic toward the end of browning the beef - you don't want these to burn). That said, be sure to get some browning on the beef and pan/pot - this will add flavor.  And if you burn some onions, I'm sure it will be okay.  I have, and it is.

If transferring beef to a large pot, add beef, and all but 1 cup of beef broth.  If using a pan to cook the beef, onions and garlic, use some broth at this point to deglaze the browned bits in the pan and add this to larger pot.  This is tasty stuff.

To the larger pot, add the salt, pepper and rosemary. 

Reduce heat to a simmer.  Cover and simmer for at least an hour - until the beef begins to be tender.  Stir often.

When close to an hour of simmering, I sauté the carrots in some butter or olive oil.  I'm convinced this adds to their flavor.  

When I figure I have 20-30 minutes more of simmering time, I add the potatoes and carrots to the pot and continue simmering until the vegetables are soft-ish.  Not too soft.

After the carrots and potatoes are suitably soft, it's time to thicken the stew.  Turn up the heat to a low boil. Working with 1/4-1/2 cup of the saved-back beef broth, add 1 Tbs of cornstarch to broth, stir until smooth, then add to the slightly boiling pot.   If this doesn't thicken the stew enough, do this again with the remainder of the beef broth, otherwise, simply add the remainder of the beef broth to the pot.

Shortly before serving, add the frozen peas.  I didn't have peas the last time I made this, and found it was fine without them.

Serve with a salad (if you like) and a warm roll or some crusty bread (a must - unless poor you is going bread-less). Actually, I've cut way back on bread, and all kinds of refined carbs, but I make exceptions for something like this.  You do you.

~~~~

This section is a combination of adaptations to the original recipe, and adaptations for making this a low-salt stew:

First of all, I skip the traditional dredging of beef cubes with flour before browning.  While this can add to the flavor and thickness of the stew, I first left it out when making this for someone who is gluten-free. It was then I happily realized this is an unnecessary step for creating a perfectly good beef stew.

Skip the salt

If skipping salt, try adding more rosemary for more depth of flavor.  I added quite a bit more on the no-salt version.  Taste test, though.  Rosemary isn't a shy herb.  

I prefer using fresh minced garlic, but will sprinkle in some dried ground garlic later if the stew needs more.  Because I don't measure much, and I often use more broth than called for (because I typically use more of all the solid ingredients than called for), I often end up adding seasonings at some point and taste-testing it.  And as mentioned in the ingredient list, I'm also not above dropping in a beef bouillon cube to boost the flavor.

Other things I do not use in this recipe:

celery
wine
tomato paste 
and rarely, do I add water.  If more liquid is needed, I typically use more beef broth.  That said, if it just needs a cup of liquid, and I don't want to open a new container of broth, I'd use water.

If making this for someone who is on a low-salt diet, there are some low salt beef broths available.  I will not kid you...  they are expensive, but they are available, and will make this stew edible by pretty much anyone.  If anyone knows of other no-salt flavorings that would go with beef stew, I'm open to hearing about them. Especially, if they aren't expensive.  While I was okay with the flavor of the no-salt version I made, I much prefer this with salt.  The gal I made it for, said it was good, her taste buds being trained to less salt.

While it's an easy recipe, Beef Stew isn't exactly a quick meal.  When I plan to make it, I almost always do some prep the day before cooking it.  This last time, I actually browned the beef and froze it in a large baggy almost a week before.  But typically, I will brown the beef, and/or cut up the carrots and onions the day before assembling this recipe. 

I think I've exhausted my tips, suggestions, additions and subtractions.

If you make this, I hope you enjoy it as much as we do!

Sunday, January 12, 2025

Quiche Lorraine...

In an attempt to keep my recipes from getting lost, I'm ever-so-slowly posting them here on my blog for easy access.  

A few years ago, I went through all my cookbooks and Taste of Home magazines, and made copies of what I wanted to keep, and then recycled the stained, falling apart cookbooks, and rehomed a bunch of still nice, but not necessarily wanted, cookbooks and magazines.  I put photocopied recipes into sleeve protectors, and then into two three-ring binders with dividers. I can add to the binders any time I find a recipe online that is a hit, or I want to try.  This system, along with my collection of recipe cards (stored in three recipe boxes) has served me well ever since.

But recently, it seems my old tried and true Quiche Lorraine recipe, that I'm sure I photocopied from an old Pillsbury cookbook, turned up missing.  I hope to someday discover where I stuck that original recipe, but without it I did what modern cooks do and I searched for quiche recipes online.

Working from a couple of different recipes I've found online in recent months, I have put together a recipe that I think is basically the recipe I used to use.

If you're so inclined to try this version, I hope you liked it as much as Hub did.  He pronounced yesterday's quiche "the best I've ever made."

Considering quiche a simple dish, but knowing somehow it can sometimes also be finicky, all I can add to Hub's high praise is "Good Luck!"

~~~~~~


Quiche Lorraine

Ingredients:

1 par-baked pie crust (comments about par-baking a crust will be at the end of the recipe, and here is a video for reference, as well.  Or this one is informative and funny. Note: I start with a 400 degree oven, and turn it down to 375 after a few minutes.)
1/2 lb strips of bacon (I prefer thick-cut bacon)
1/2 cup chopped onion
1 cup shredded swiss or gruyere cheese (or combination)
1 1/4 cup heavy whipping cream, or a combination of milk and cream.  Some recipes call for Half & Half, but I think Quiche Lorraine is better if more cream than milk is used.  That said, if you want to healthify this a bit, H&H is an option.
3 large eggs
1/4 tsp salt
1/8 tsp cayenne pepper  
1/8 tsp nutmeg


Instructions:

Cook the bacon (here is a video for cooking bacon in the oven - I highly recommend this method).  Though you do need to keep an eye on the bacon toward the end of its cooking time.  It can go from perfectly crisp to burnt if you don't check on it.  Also, thick-cut bacon will likely take a little longer to cook than regular-cut bacon.

After it's cooked and cooled, crumble bacon in 1 - 1 1/2 inch pieces and set aside.

Par-bake the pie crust until light brown. (I start baking at 425, and turn the heat down to 375 after a few minutes). Again, here is a short video and a longer video here that will walk you through this process.  I strongly suggest watching either or both of the videos and/or reading all my notes below before doing this, so you don't have to learn the hard way that there is a right and possibly very wrong way to par or pre-bake a pie crust.   I strongly urge against simply following instructions on the packaging of a store-bought pie crust for how to par-bake.

Preparing the filling:

Sauté chopped onions in butter (or oil) until they are somewhat translucent.   Add the sautéed onions evenly to the bottom of the par-baked pie shell.

Add half of the bacon, all of the cheese, then the other half of the bacon, spreading each layer evenly in the pie shell.

Whisk 3 large eggs, adding 1 1/4 cup whipping cream (or combination of milk and cream), 1/2 tsp salt, 1/8 tsp cayenne pepper, and 1/8 tsp ground nutmeg.  Pour over the solid ingredients, covering everything, but be sure to not overfill pie crust.  If you need more liquid filling, just whisk an egg with some milk or cream and add to what is already in pie shell.  You can add additional, but tiny, amounts of the seasonings in this case, but for this small amount, it shouldn't be necessary. But it also shouldn't hurt.  So yeah...  go ahead if you have any doubts.

Place filled pie shell on a baking sheet, and loosely cover pie with aluminum foil (so that the crust doesn't burn).  Bake in a 350 degree oven for 40-60 minutes, or until a knife inserted into the middle comes out clean. The quiche will continue to cook as it cools for a few minutes.  My quiches almost always require a full hour of baking, but I start checking at 40-45 minutes.

Remove from oven, and let stand for a few minutes.  Slice, eat, and enjoy!


Comments on pre- and par-baking a pie crust:

I have recently learned (or have maybe relearned) the benefits and hazards of pre or par-baking a pie shell.  The benefits are that the result will be a crispy, flavorful crust instead of soggy, bleh one. I didn't use to do this when making quiche, but it makes such a difference I can't imagine not par-baking a shell for quiche ever again.

See that flaky, crispy crust!  
I makes me kind of sad to remember 
all the soggy-crust quiches we've eaten.  

Now, the hazard in pre- and par-baking is that if the oven is not hot enough, or crust is not cold enough, or possibly not made with a solid fat, the crust can melt, shrink, and fold in on itself when put into the oven.  This happened to me for the first time (that I remember) a few months ago when I was making quiche for young friends who'd just had a baby.  When you're due to deliver a hot meal in a couple of hours is not the time to learn a hard lesson, but learn I had to.  And fast. 

I think I was using a prepared refrigerated pie crust that you unroll onto a pie plate, and I par-baked the crust according to the package instructions.  When I took it out of the oven, I was panicked to find the pie shell was collapsing in on itself.  It was completely unusable for putting quiche filling into.  Fortunately, Hub was at the grocery store right then, and I called and asked him to bring home a couple of new pie crusts.  Meanwhile, I searched online how to prevent this from happening again.

Everyone online talked about pie weights.  Even now, with a bit of experience, I think ceramic pie weights may be the most reliable option, but I didn't (and still don't) have any.  Every time I think about their expense vs how often I'm likely to use them gives me pause.  And I have no way of knowing if one package of pie weights would be enough.  If not, they're even more expensive. 

I would have to think about that another day.  In the moment, I needed a quicker solution than ordering pie weights.

Then it dawned on me.  Dried beans might work!  I thought I had a bag or two, but all I found in the pantry were two bags of dried lentils.  

Hmmm.  Well... why not.  


Par-baking the pie crust:

When Hub got home with the new (this time, frozen) pie crusts, I cranked up the heat in the oven. Then being sure to only partially thaw the frozen pie shells, I pricked them thoroughly with a fork, then lined the very cold crust with parchment paper and poured in the lentils.  


It worked!

But the pie looked a little undone in the middle:


So, I put it back in the oven (without the lentils and parchment paper) for just a few minutes until it looked like this:


A nice, flat-bottomed, crispy crust

Then I cooled and collected the lentils 
in a gallon zip-top bag to be used again.  
And again.
And again.

I think I've got my pie weights!


I still don't know why this was the first time I'd ever had this bad experience. I know in the past I've pre-baked pie shells (homemade and store-bought) to fill with custard fillings, and I don't remember using any kind of weight to keep the crust in shape, and I don't remember ever having a crust collapse in on itself.  This makes me wonder if the main reason this happened recently is that manufacturers have moved away from using solid fats in their crusts and have replaced the fat with oil.  What made me wonder this, was reading some comments on a product page for Marie Callender pie crusts, where people were complaining that their once delicious pie crusts were no longer as good due to this change.

I have no idea.  The first time I'd ever used a Marie Callender crust was when Hub brought some home for me when I was in my predicament, and I thought they were good.  In fact, one day after that, I was going to pick up some more frozen pie shells, and I noticed that their Marie Callender shells were on sale.  They were some crazy low price, so I think I bought four 2-packs.  I figured they would keep fine in my freezer at home.  Which leads me to my next tip:


Dealing with cracks in premade pie crusts:

At home with my bounty, I pulled out a two-pack to make whatever it was I had gone shopping for pie shells to make, and when I took them out of their packaging, I found they were cracked - like in a lot of pieces!  Aaaaah!  That's why they were marked down so low. Grrrrrr. 

Seriously disappointed, I went online to see what I might do with these pie crusts, and I came across the idea of patching them with a flour and water paste.  While on a small scale, I had patched pie shells by wetting the dough and pinching tears back together, or layering dough on top of a hole, the idea of "pasting it back together" seemed both wild, and obvious at the same time.

Instructions I read call for a 1:1 ratio of water to flour, but measuring seemed unnecessary.  I just made a paste and starting filling in cracks (on a thawed shell).  Yesterday, when I did this again, I snapped a picture to show you what this looks like:


Back into the freezer it went until I was ready to pull it out for baking.  And here's a picture, again, of yesterday's par-baked pie crust:


Except for a few spots where I could have spackled it better, you can't tell this pie shell was dropped and cracked at some point in its life.

Would I knowingly buy frozen pie crusts at a questionably deep discount in the future?  I don't know.  These were all broken differently, and some were a real mess before their repair.  BUT, I don't worry about the possibility of bringing home a broken or cracked shell now.  While it felt annoying to discover them cracked, it's a relatively simple fix.

I think that's about all I have to say about frozen pie crusts.  I sometimes think of making them from scratch again, and while that isn't exactly hard to do, it's a bit time consuming, and messy, and results vary.  

But, especially in today's economy, they would be a lot cheaper...

Maybe someday...

Let me know if you enjoy making pie crusts, and if you have any secrets to a delicious flaky crust. 


Friday, April 5, 2024

Strawberry muffins...

With a new strawberry season approaching in a month and a half (or so), I've suddenly woken up to the fact that we need to get serious about using up a bunch of frozen strawberries in our freezer!

Last June, with me having a major surgery scheduled in the middle of the month,  we picked strawberries and ate them 'till we couldn't anymore.  I imagine we may have given some away as well, but by the time I submitted myself to the surgery center and the subsequent weeks of healing, the freezer was stocked with a dozen or more quart-sized frozen bags of beautiful red berries. 

All that picking and freezing would be so nice come summer, I thought.  I couldn't have planned it any better.  I did worry a bit about how we would manage picking the cherries and peaches we expected the next two months. 

Then, surprisingly, neither the cherry tree nor the peach tree produced anything in June and July.  We don't know if it was weather related or if we had pruned the trees too much the fall before, but in the end it felt like a mercy that we didn't have any fruit to deal with during the weeks I was healing from surgery.  

And then, when chemo started in the late summer, and my taste buds immediately became affected, I discovered that fruit (especially strawberries) tasted like soap.  Blech.  It became clear that none of the frozen strawberries were going to get eaten for the duration of that unpleasantness.  I think it was Thanksgiving before food started tasting in the neighborhood of normal, and the tastebuds were only fully back as Christmas started to approach.  

Then winter set in and I was decidedly not into eating frozen strawberries, or making smoothies or fruit popsicles (my other frozen strawberry treats)  once it turned cold outside.   And even though we've had an unseasonably warm late winter and early spring, by that time the frozen strawberries had pretty much slid off my radar.  

All of that is to explain how more than nine months could go by and very few of the frozen strawberries picked in the early weeks of June last year got eaten.

So recently, I've gone online looking for what to make with them - because it's become chilly again and I still don't want to eat frozen strawberries. 

Having no desire to make jam and, not caring much for fruity desserts, my options seemed severely limited. But then I was a little intrigued  when I came upon recipes for strawberry muffins. I wasn't 100% sure they sounded good, but everyone who had a recipe blog seemed to be in love with strawberry muffins.  The thing that held me back at first was that almost all the recipes I found said to use fresh strawberries - with the explanation that frozen strawberries would do if fresh wasn't available.  The vibe I got was frozen strawberries might make subpar strawberry muffins.  And that notion got in my way for several weeks, I'm sad to say.

Finally, I decided I wouldn't know if I didn't try, so I took the plunge.  And I am so glad I did.  I decided to use this recipe at Once Upon A Chef and I have decided I need look no further. I did forego putting sugar on top of the muffins (ack!  too sweet for me), and I don't have any almond extract, but other than those two things, I followed the recipe exactly - chopping up still partially frozen strawberries, tossing them in flour as suggested, and these strawberry muffins were superb, in my book.


I may try making them with a bit less sugar - not because they are too sweet, but less sugar would be - well... less sugar.  


Warm and slathered with butter, these were just heavenly.  I honestly, I love them every bit as much as I love blueberry muffins.  And I LOVE blueberry muffins.


At room temperature, they are a tasty quick treat.  I skipped the butter. 

I'm thinking for my next batch I'll try substituting whole wheat flour for some of the all-purpose flour.  I've been meaning to grind some wheat.  Now I have a perfect reason to stop dragging my feet and get that done.  Oooh... and some flax seed.  I need to try ground flax seed in these, too.  

If I could get these a bit healthier, and they still taste good, wouldn't that be nice.

Maybe I can tweak the recipe enough to make it my own and post it here.  I'll try, but until then, I highly recommend the recipe I followed.

To be honest, the website I've linked to is monetized to the point of annoyance.  Normally, I try not to link to such websites, but one can go in, click on "jump to recipe" and print it out without too much headache.  Unless pop-up ads, and constantly changing videos give you a headache - in which case, I am sorry. This is the best I can offer for now.

If you give this recipe a try, I hope you enjoy them as much as we do!


Are you hungry yet?


Saturday, September 16, 2023

Green Beans, Sausage and Potatoes...

On a much lighter note than recent previous posts, I'm shifting gears to share (mostly recording here for myself so I don't lose it) a new-to-me dish and recipe:  Green Beans, Potatoes and Sausage.   

A super easy recipe, that harkens back to simpler, heartier times, this is actually a very old dish.  I imagine my own mother made it and served it, and I'm sure I would not have thought this was good as child.  In fact, it was only when a friend made it for us recently that I found out how delicious it is.  I've made it twice now - with mixed results.

My best version of this was made with fresh green beans.  Many people use canned green beans, but when I tried them they cooked down too quickly, and when I reheated it, the green beans were practically mush.  While I didn't cook the canned beans nearly as long as I cooked the fresh green beans, I may have still cooked them too long.

There are many variations of this recipe online, and this one is very simple.  It can be made bolder by adding bacon, or using bacon drippings, and by using some other spices (I'm thinking of trying a shake of Creole spice mix next time).

I cooked the ingredients separately, and add them all together after the beans are cooked since the separate ingredients will take different times to cook.  Most recipes I've seen online do not do this, so I'm open to thoughts and suggestions about this.  I've also seen a sheet pan recipe that looks like it might just be amazing.  But for now, I offer up:

Green Beans, Potatoes and Sausage


Ingredients:

Fresh Green Beans (as much as you want to make)
Potatoes, cut up into bite-size pieces  (I think any type will do)
Rope sausage, sliced or cut in chunky bite-sized pieces  
         (I used Hillshire Farm Smoked Sausage)
Chicken Stock (at least a quart)
Onion, chopped
Salt
Pepper
Garlic Powder (can also use fresh, minced garlic)
Any other favorite seasonings, to taste

Wash and cut fresh green beans.  Heat beans up in a pot of water or chicken stock (or a combination of both) and cook until beans are tender.  Depending on the type of green bean used, this can take anywhere from 30 minutes to an hour or more.  If using canned green beans skip cooking the beans ahead of time. 

While beans are cooking, saute slices of sausage along with chopped onion until the sausage is heated through and browned.  Set aside.

About 30 minutes before the beans should be done, either boil or fry up the potato pieces (I boiled mine, but will saute them the next time) until tender.  Drain boiled potatoes and set aside.

Once the green beans are tender, add the seasonings along with the sausage and potatoes to the pot of green beans.  Cook until flavors meld, and the whole thing is hot. 

You can eat this like a stew by scooping out liquid with the beans, potatoes and sausage, or use a slotted spoon to dish onto a plate.  We've eaten this as a main dish (don't think I served anything else with it), and I've enjoyed the leftovers for as long as they've lasted.  The first batch (made with fresh green beans) I shared with a friend, I thought it was that good.    

I would be interested in reading in the comments any variations you may have made of this dish.  Also, I'd love to hear others' experience and suggestions you have for using canned or even frozen green beans.


Thursday, February 2, 2023

Fajitas for supper...


The seasoning I use is Kroger brand fajita seasoning mix (in the little packet, not bottle - I don't care for the flavor of the Kroger brand seasoning that is sold in the bottle) sprinkled directly on the meat and veggies as they are sautéing in avocado oil.  Chicken sautéed first, then the peppers and onions together - to just barely cooked (I like the veggies a bit crunchy).  The avocado slices are my latest addition.  

An easy, relatively healthy meal made with low carb tortilla shells.

I have no idea if this seasoning mix creates fajitas as they are supposed to taste, but we like it:
photo pulled from Kroger's imstacart.com website


Monday, August 8, 2022

Healthified Egg Salad...


I've had a hankering for an egg salad sandwich for a little bit now and when Hub came home with a box of small croissants (marked on clearance) yesterday, I new I needed to give into my hankering.  While there is nothing difficult about making egg salad, since it had been a while since I'd made it I went looking online for a recipe to make sure I didn't leave out some important ingredient.

I'm so glad I did!  Somehow "healthy egg salad" popped up and I was inundated with recipes that replace the mayonnaise with plain yogurt.  After skimming different recipes I decided to just wing it with whatever I had in the kitchen that I thought would be good.   I don't have an exact recipe to offer you, but I'll pretty much tell you how I made it.

First some notes:  Of course, I used Skyr (in place of the plain yogurt, which is in place of mayonnaise) but if I didn't have that, I'd have used plain Greek Yogurt in place of mayonnaise.  I think regular ol' plain yogurt would be too runny for this.

I chopped up everything real fine (except for the egg white - that I chopped medium-size-like), and mixed the following things together so that it tasted more or less like my regular egg salad:

Chopped hard boiled eggs (I used 8, but only because I made the salad it too thin and I needed more egg to balance the liquid-y texture).

Finely chopped celery

Finely chopped onions (I used my Walking Onions)

Mustard (a lot of recipes suggest Dijon, but I didn't have any, and I'm not sure I'd like it, anyway)

Plain Greek yogurt (amount is up to you) go easy until you get the consistency you like.

Spices:   Your choice

I put in Salt & Pepper to taste.  And Mrs. Dash Original Salt-Free Seasoning.  I know...  I already put in salt, but I love this stuff.  It always goes in egg or chicken salad here.

And because after all that it still needed something, I put in a dash or two of bottled lemon juice (bottled is all I had).

Because by this time I had made it too runny, I boiled two or three more eggs, and by the time I mixed those in, it was too dry, and at this point I added about a tablespoon of Hellman's Mayonnaise to see if it stepped up the taste a bit.  

Now, I'm not going to pretend this didn't taste different.  It did.  And I thought for sure Hubs would look at me funny when he took a bite.  But he didn't.  He said it tasted good. 

Honestly, I'm not sure that little bit of Hellman's made any difference, so I may skip it next time.  I would prefer to try adding more/different spices until the flavor zings for me.

But really...  except for putting my healthified egg salad on a croissant (a very small one, mind you), this is a pretty passable healthy substitute for egg salad made with mayonnaise.

I'm curious if others of you have ditched the mayo for Greek yogurt in your egg salad.  Let me know in the comment section.  And feel free to let me know what you put in your egg salad - healthy or not.

Saturday, July 23, 2022

Chicken Burritos - Healthified...

Chicken Burritos has been a favorite of hubs and mine for years.   I got the original recipe (below)  from my mother-in-law more than a decade ago, and it may be that the recipe she gave me is floating around out there on the internet, but I've never looked it up, and I've kind of healthified the original, so I'm giving you both recipes below.  

While I have given measurements, I am not a stickler for them.  I suggest using them the first time, and erring on the side of more sour cream (or yogurt) and cheese.  I almost always add more cheese to a recipe.  You also may want more chili pepper. I usually add more, but sometimes Hubs and I suffer for it later - we are not super spicey food eaters.   

While the first recipe calls for a rotisserie chicken, you can substitute any cuts of chicken (fresh cooked or leftover) to make approximately 4-5 cups of shredded chicken.  I've made this so often over the years, I go by taste and texture - I've learned it's best if the chicken mixture is too moist, rather than too dry.  

There is no rice in these burritos.  Never was, never will be - unless you want to put it in, in which case, you're on your own.  Anyway, here goes:
 

This is one burrito cut in half


Chicken Burritos Original recipe:

1 rotisserie chicken
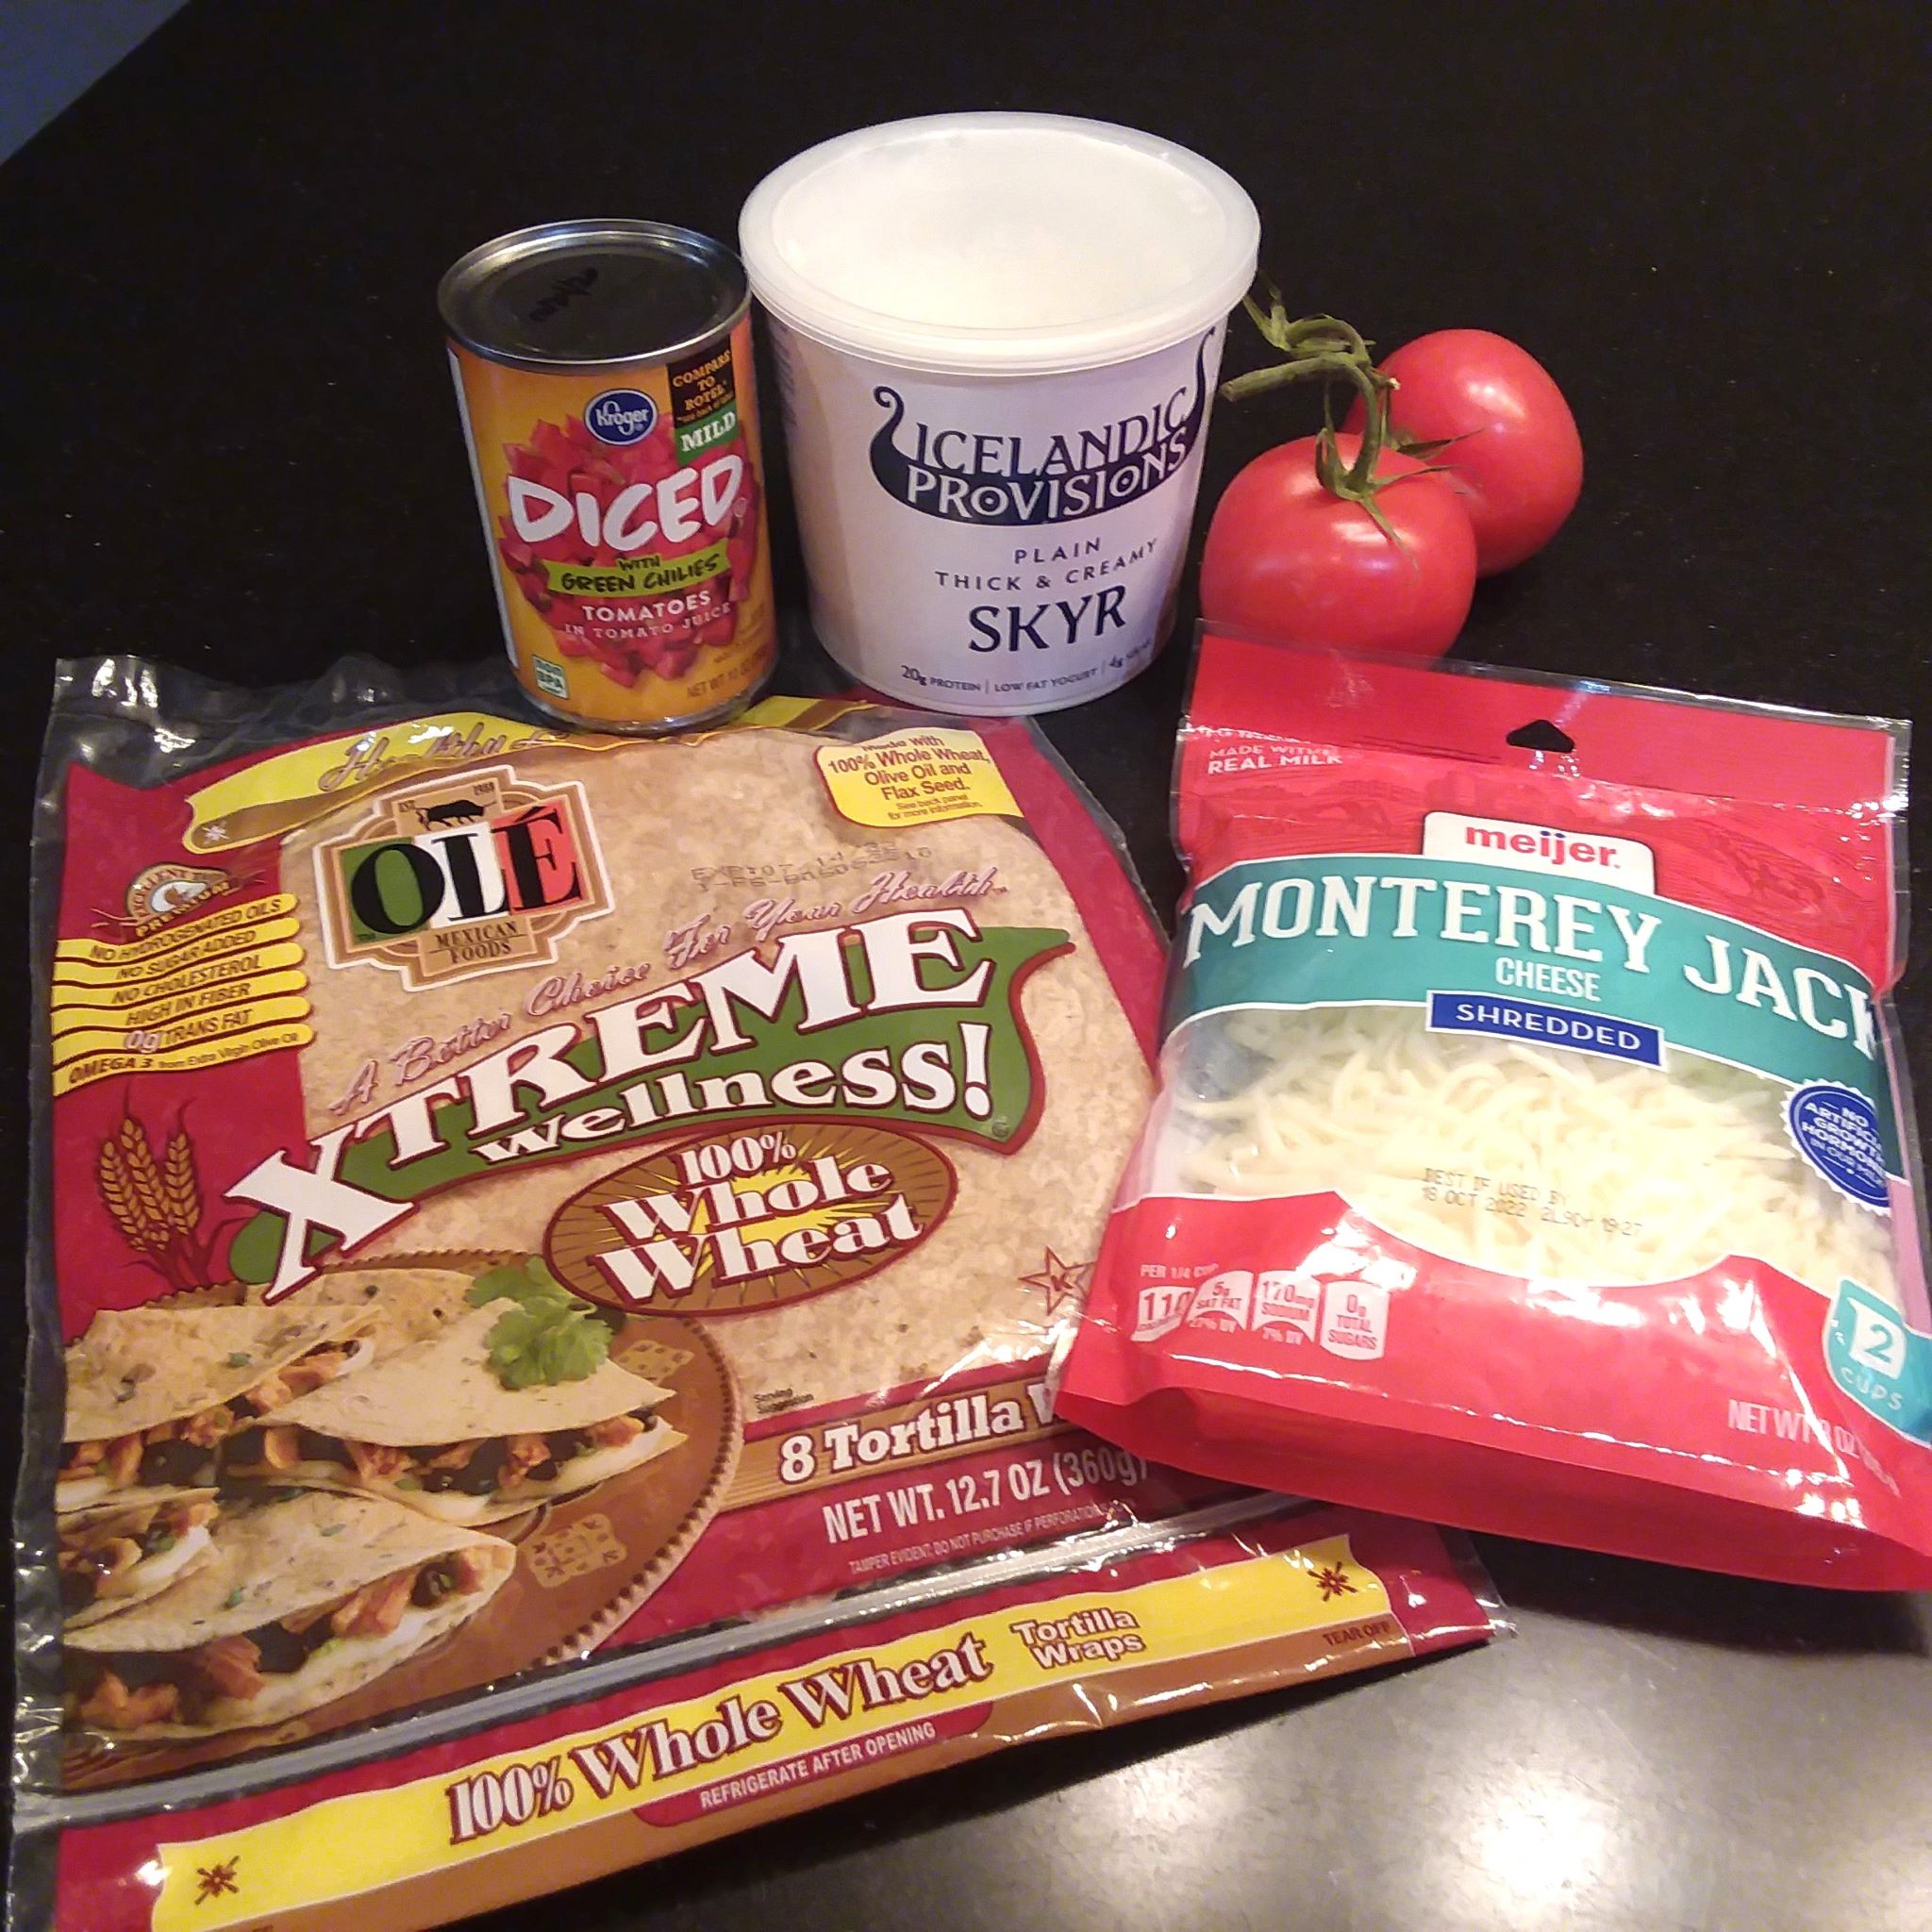
1 10-oz can tomatoes with chili peppers (or you may prefer jalapenos)
1/2 cup sour cream (use whatever amount gives a very moist mixture)
1 Tbs Chili Powder
1 tsp salt
1 16-oz can refried beans
8 8-inch flour tortillas
1/2 - 1 lb Monterey Jack Cheese, shredded (depending on your love of cheese).  


Pull meat into thin shreds.  In bowl, stir together shredded chicken, tomatoes (with peppers and all juices), sour cream, chili powder and salt until well mixed.  If the mixture seems a bit dry, add more sour cream.

Preheat oven to 425 degrees F.  Spread 1/8 of refried beans evenly on one side of the tortilla.  Spoon 1/8 of chicken mixture atop the refried beans.  Reserve 1-2 cups (depending on how much cheese you started with) of shredded cheese to melt on top of burritos later. With remaining cheese, sprinkle 1/8 of what is left over chicken and beans.  Roll up tortilla and place burritos seam-side down in a greased (I use butter) 12"x 8" baking dish.

Cover baking dish with foil and bake 30 minutes or until burritos are heated through.  The chicken mixture will start to bubble out from both ends of the burritos.  Remove foil and sprinkle burritos with reserved shredded cheese, back in the oven (uncovered) for 5-10 minutes longer or until cheese melts and begins to brown.

Serve with chopped lettuce and tomatoes, or any side salad.  Makes 4 generous servings.

~~~~~


Healthified Chicken Burritos

2 or 3 med-large chicken breasts - cooked and shredded
1  10-oz can tomatoes with peppers
1/2 cup Greek yogurt 
1 Tbs. chili powder (add chili powder to taste)
1 tsp. salt
1 16-oz can fat-free refried beans (or vegetarian refried beans)
1 8-inch whole grain, keto friendly tortillas
1/2 - 1 lb Monterey Jack Cheese, shredded (depending on your love of cheese).


Pull meat into thin shreds.  In bowl, stir together shredded chicken, tomatoes (with peppers and all juices), sour cream, chili powder and salt until well mixed.  If the mixture seems a bit dry, add more sour cream.

Preheat oven to 425 degrees F.  Spread 1/8 of refried beans evenly on one side of the tortilla.  Spoon 1/8 of chicken mixture atop the refried beans.  Reserve 1-2 cups (depending on how much cheese you started with) of shredded cheese to melt on top of burritos later. With remaining cheese, sprinkle 1/8 of what is left over chicken and beans.  Roll up tortilla and place burritos seam-side down in a greased (I use butter) 12"x 8" baking dish.

Cover baking dish with foil and bake 30 minutes or until burritos are heated through.  The chicken mixture will start to bubble out from both ends of the burritos.  Remove foil and sprinkle burritos with reserved shredded cheese, back in the oven (uncovered) for 5-10 minutes longer or until cheese melts and begins to brown.

Serve with chopped lettuce and tomatoes, or any side salad.  Makes 4 generous servings.

That's it!  This recipe is so easy that once I'd made it a few times I no longer look at the measurements.   I might double-check the recipe for the ingredients, but once they are gathered, I just create a mixture that looks nicely moist, and spread whatever amount of refried beans on the tortilla that looks good (I often have to open a second can of beans). 

When our boys were home, I often made a larger (even double) batch - depending on how many tortillas I have.  Now that it's just hubs and I for most meals, I always have more than we can eat in one meal.  I just freeze any extras prior to baking and thaw later.  Once thawed, bake as described above.  

We have found, if the inner mixture is moist enough, these also make tasty leftovers - cover with foil until they are bubbly, then sprinkle with a bit of extra cheese. I often re-heat in the toaster oven (on the bake setting).  Leftovers on these are a bit hit and miss, though, I must admit.  These are best eaten the first time they are baked.  If you know you're making more than you'll eat at one meal, just bake what you think you'll eat, saving the rest in the freezer (or even fridge, if you plan to cook them within a day or two).

If you try them, I hope you enjoy!

Wednesday, July 6, 2022

Skyr and a recipe...


Recently, I came across a new-to-me product called Skyr:

Skyr is an Icelandic yogurt that is thicker and a bit less tangy than Greek yogurt.  I don't typically eat plain yogurt (because it sooo tangy), but I thought this stuff was pretty good. Mostly, the texture is what makes it better to me than Greek yogurt - which I thought was "the bomb" before this.  I bought this brand at Fresh Thyme Market, but I also found it at my local Meijer yesterday.

Anyway, I shared the picture with my two sisters via text and a conversation ensued about yogurts, probiotics, just generally healthy eating... 

And my sister, Sherri, offered up a recipe.  It sounded so good I told her if I liked it,  I would post it to my blog and give her credit.   I did make it, and here it is: 


While I made it without paying any attention to measurements (I know I added more berries, and I completely forgot the walnuts), I give you Sherri's breakfast recipe (complete with her notes):

 ¾-1 cup of Fage Greek Plain yogurt. (I like 2% the best but they are all good depending on any dietary considerations.)

1 Tbsp of chia seeds. I stir and let sit for 5 – 10 minutes.

Top with a couple tablespoons of walnut pieces (Full of all kinds of good things for you: polyunsaturated fat, antioxidants and Omega 3’s)

And 3-4 berries. (I like to crush 3 blackberries with a spoon to stir them through the mixture.  


Sherri also writes:


"When I am out of berries, I have used an all fruit spread, which tastes delicious too. Blueberries, strawberries, raspberries would be fine too but I think the crushed blackberries enhance it the most.


I’ve had this nearly every morning for about three years and I am addicted to it. It is so easy – I don’t have to think what will I eat?   And it's probably more nutritious than anything to start the day.


The chia seeds and walnuts I buy on Amazon in the 2-lb packaging and are staples in my refrigerator. A small container of blackberries at 3 per morning will last a week. The yogurt I buy most every time I go to the grocery. I like the taste and texture of Fage Greek the best and its sugar content is the best I’ve seen."


~~~~~


Thank you, Dear Reader, for hanging out with me again.