Showing posts with label Autumn. Show all posts

Tuesday, November 19, 2024

Backyard soldier...


Winter Sentinel

At the kitchen island
inside eating lunch

I felt someone was watching me
- it was just a hunch.

Glancing out the window
I saw my hunch was true.

A stoic one-eyed face
was filled with attitude.

First he looked to have a smirk
 a challenge meant for me

to come outside and have look?
He'd wait there by the tree.


Outside, things looked different.
Of course, they always do.

The warm breeze, the shining sun
gave me a different view.

With the shadow of a frown,
he now looked rather sad.

What was the fella thinking?
Nothing's quite that bad. 

Sun was shining, warm breezes blew.
Clouds had disappeared.


Looking up, I noticed sky
where once were only leaves

and at his feet was cooling earth
no need for canopy.

Ahh..  I understand.  I feel it too.
I know this lovely day

will disappear, with chilling winds
soon turned to winter's gray.

I'm sorry you are stuck out here
to face the frozen blasts.

To weather winds and shoulder snow,
enduring bleak forecasts.

It does seem an unfair fate
to one who, weeks before,

had blessed the world with yellow notes
of autumn's glorious score.


I promise I will not forget
you're out here standing guard,

Mustering all your strength to be
spring's beau of the backyard.

While you're not the tallest soldier,
you're very much held dear.

You'll be the first I notice.
as you're the first to bring me cheer.

~ Becki B.


Friday, December 1, 2023

Goodbye November...

Yesterday, the last day of November, Greg announced all the outside work was basically done and now he can enjoy winter.  😊


In November, the rogue Mulberry tree came completely down and we hired a tree removal company to take the stump all the way to the ground and grind it up.   The shrubs it was growing amongst will look so much better next summer.


Greg spent a number of autumn afternoons riding the lawn mower pulling a leaf sweep to clean up the brown leaves that took their time falling all month long.  And yesterday cleaned the last of the leaves out of the gutters.


The leaves and sheared pampas grass had their final burn on the last day of November.

As for my contribution this autumn... 


I covered the asparagus patch with the piddly little amount of leaf mold my compost bin produced, then I added new leaves to the compost bins.  Hopefully with a second bin, we'll have a bit more leaf mold next year.  Looking at the picture, I wish I'd collected more leaves, though...


I didn't have it in me to do any serious cleaning up of the strawberry bed, so I just covered it with straw for the winter this past week, and plan to neaten things up before the strawberry plants start blooming next spring.


As I was preparing to spread leaf mold on the asparagus patch, I found a couple of tiny asparagus spears growing.  I don't know if this is normal, but I was not expecting to find a tender young plant trying to get a start so late in the year.

That pretty much wraps up the garden and yard work for another year.  Last spring, I planted some things in the garden - mostly flowers, but also a few vegetables.  It turned out with surgery in June to heal from, I couldn't really tend it.  I didn't expect it to take so long to heal.  I don't regret the hard work in May, though.  Time spent tilling and planting was a welcome distraction from what was ahead for me the next 5 months.  Greg must have sensed this over the summer as we sat out back on cool evenings looking at a barren garden.  He never complained or suggested that the effort in May was wasted.  I was thankful for what was never said - it felt wonderfully generous. 

I'm looking forward to next spring and, hopefully, feeling up to putting in a garden again.  Another spring, another chance to grow things...

~~~~~

Wednesday, October 5, 2022

Early days of autumn...


The Pampas Grass blows regally in the breeze


Asparagus seed balls turn a beautiful shade of red...


And other things start showing themselves in the asparagus bed...
...like thistles - Yikes, these got big!

And I have no idea what these blue berries are.  Any ideas?


These sedum (planted on the east side of the house) started out so tiny in the spring, but have overgrown the area they began in:

Next spring I think I will divide these and plant some on the south side of the house and see if the color changes with full sun, and maybe dryer conditions.  We've never had Sedum (also called Stonecrop) before.  Given they got no attention all summer, I'm calling this a completely effortless plant.


I think I took this picture of the garden a week ago:

The dying tomato and squash plants have all been removed, and all that is standing today are yellow brittle cucumber plants (on the far right, front), the Kentucky Wonder pole beans in the back center, and a Marconi Giant Pepper plant (front and center).

At this point, I'm hoping the remaining Marconi Peppers will at least begin to turn red so I can bring them inside to finish ripening before we get some cold weather this weekend.  Every other day I'm able to harvest enough green beans for a meal (though I clean, cut and freeze them, usually).  I'm ready to just let the remaining seed pods dry out and then see if they are harvestable for planting next spring.

Editing this post just to be clear that I am not doing the work of removing dead plants.  I'm not doing anything I can't do one-handed.  While I give some direction on what is finished up and can be pulled, Hub is doing the actual work of cleaning up the garden.  
 
While autumn is my most favorite time of the year, and I always look forward to putting growing things to rest outside (even in our smaller in-town yard I looked forward to cleaning out the flower beds and pots, and cutting things down), I have to admit having only one reasonable-working hand puts a damper on my enthusiasm for the season this year.  I'm not complain' (much), just explainin'.

I hope you're enjoying your autumn wherever you are!  Or your spring if you're in the southern hemisphere!  The two most wonderful times of the year...  😊


Monday, September 26, 2016

It's almost pumpkin time!

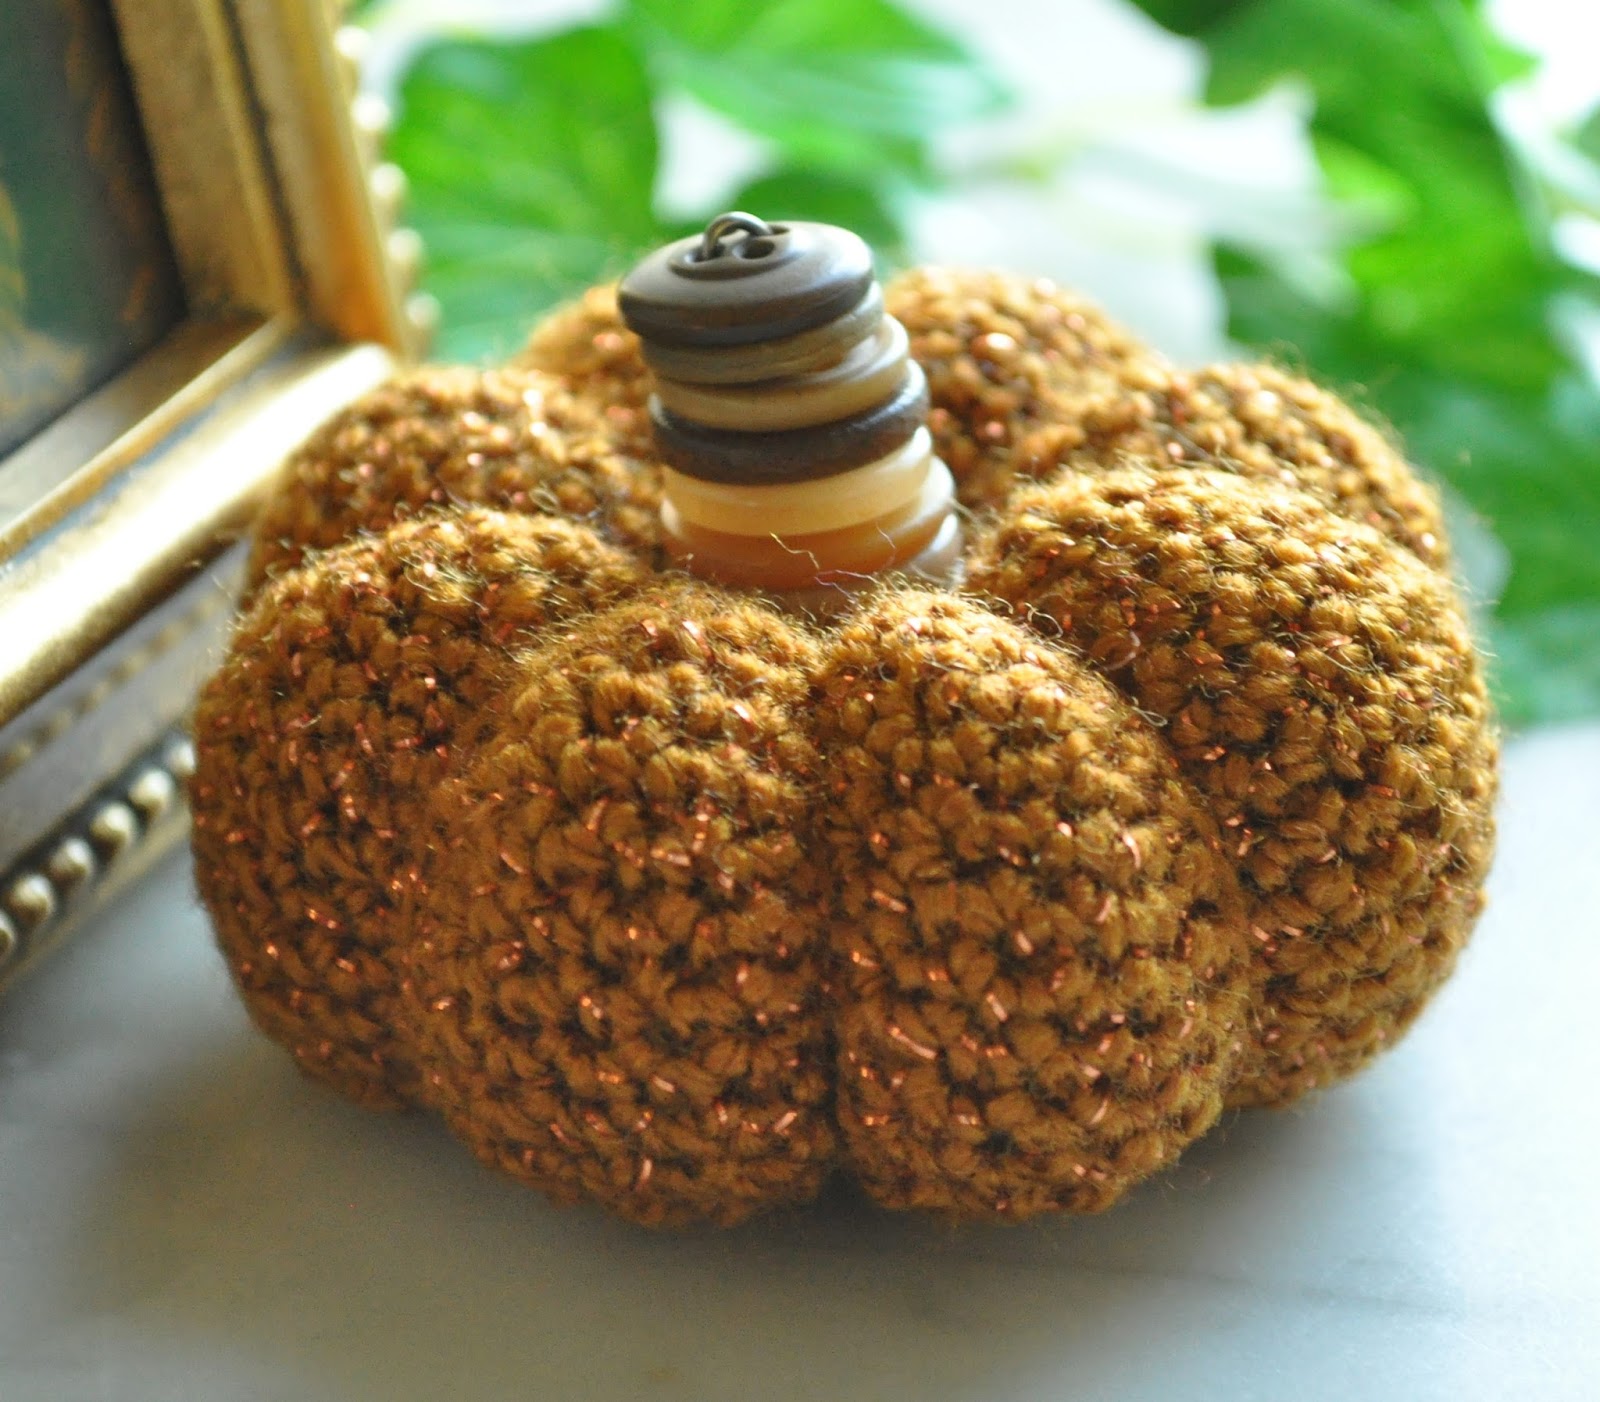
Today's post is short and sweet as this small project was all I could muster after a week of dealing with vertigo again.    I get these episodes very infrequently, but when I do they really mess with me.  Today, I'm feeling nearly symptom-free and it was so good to pick up my crochet hook and whip out this little cutie:


Every fall I get the urge to make some of these and today I pulled aside some new yarns to play with as I make some more.   I think it will be a fun thing to do tonight as I watch the presidential debate.  I wouldn't think of not watching the debate,  but I have a feeling I'll need something to keep me sane as I do.   The pumpkin above is made with Vanna's Glamour in the color Bronze.  It has some sparkly specks in it which just made it even more fun to make.  The yarn is a thin worsted, and crocheted with a size F crochet hook this little mini pumpkin measures just 2 inches in diameter and 1 3/4 inches tall - from bottom to top of stem.  I know - it looks a lot bigger than that in the picture, doesn't it.  ;^)

If you're interested in how I made the button stem, I wrote a tutorial last year that you can find here.

To see what other Yoppers are up to, visit this week's thread on Ravelry!


Sunday, October 18, 2015

How to make a button stem for your yarny pumpkin...

After making several of these sweet little things:

...it struck me that a bunch of these would make a super cute centerpiece for Thanksgiving dinner and fun little take-home gifts for anyone who might want one.   So, of course, I had to share my moment of inspiration here in my weekly Year of Projects post.  And since so many liked my button pumpkin stems on Wednesday, I thought I'd show step-by-step how to do it.

Using this pattern, a miniature pumpkin takes me just under an hour to make.  And the button stem took just a few minutes once I pulled all the materials together (wire, wire cutters, needle nose pliers, and a bunch of old buttons that I had previously cleaned and sorted by color). 


Select enough buttons to make a stem as long as you want it.  You'll want graduated sizes, and I like to use a variety of complimentary colors and materials (I used wood, plastic and even metal buttons).  Once you've picked out your buttons, stack them from largest to smallest.

As you stack them, they'll flop over on top of your pumpkin, but having them in order is important before you begin stringing them onto the wire.

Cut your wire about twice as long as you think you'll need:
I used 20 gauge wire.   You might be able to use thicker wire, but I don't think thinner wire will work.  You need a wire that is thin enough to thread onto the buttons, but thick (and strong) enough to allow you to push it through the pumpkin. I found 20 gauge wire flexible, but with just enough body for this purpose.   And 20 gauge is what I had on hand.  I almost always try what I have on hand before buying something else.

"Fold" the wire in half (make this a soft fold, or a curve - as opposed to a sharp fold). Trim one side of the wire shorter (it took me several fiddly attempts before this little idea occurred to me.  Do it. It will make it easier to thread buttons onto the wire):

Starting with the smallest button, thread it onto the longest wire end first, then pull the button down, slipping it onto the shorter end of the wire (through the opposite button hole), all the way to the "fold" of the wire.  Pull the wire tight:


Don't try to thread more than one button at a time.  If you thread more than one at a time,  you won't be able to see the button holes and you'll likely thread the buttons on crooked.  You always want to thread the buttons onto the wire through opposite button holes (this is important to pay attention to if your buttons have 4 holes).  Your stack of buttons should look like this:


To make pushing the wire through the pumpkin easier, cut both ends of the wire on the diagonal, making a point:


Decide which side of the pumpkin you want to be the top and push both ends of the wire into the center of the top all the way through the bottom. 


The wire ends will not likely come through the same place on the bottom.  Not to worry.  While you want them to be close to the center (and close together), it's fine (maybe better) if they don't both come through the center hole.


From the bottom, pull tight and twist the wires together by hand (this doesn't have to be perfect - just tighten and twist the wires together as best as you can by hand, making sure the buttons are snugged together on the other side of the pumpkin).  You'll want an inch or so of twist.  Trim the excess wire off.


Now, with a needle-nose plier twist the hand-twisted wire into a small circle and push the sharp edges of the wire up into the pumpkin:


And that's it!   Do this over and over again, with a variety of yarns and buttons, and soon you'll have a heap of pumpkins!

Just a few more and I'll be ready for Thanksgiving! 

To see what other Yoppers are up to this week, visit our thread on Ravelry.  


http://www.ravelry.com/discuss/a-year-of-projects/3300857/1-25#2


Wednesday, October 14, 2015

Pumpkin Season...

I've been fixated on pumpkins lately.  I've yet to buy a real one this fall, but I'm happily crocheting yarny ones.  And this week I'm enjoying reading a cozy mystery, Basket Case by Nancy Haddock.  Autumn seems like the perfect time to read cozies, for some reason.


The yarn I'm using above is Vanna's Choice in Tangerine Mist.  I found a lone skein of this color on clearance recently and it was so inexpensive I couldn't not buy it.  Didn't know what I was going to use it for, but as pumpkin season rolled around I realized it would be perfect for this project.

Using my favorite, fail-proof small pumpkin pattern, I love making various sizes and colors of these pumpkins.  For giving and decorating.  You can increase the pumpkin size by either (or both) changing up the hook, and/or adding or decreasing the number of increase and decrease rows.  


They can be made taller by adding more (I'll call them static) rows in the middle (these rows are just straight single crochet all the way around with no increase or decrease stitches - they give the pumpkin its height).

While I enjoy seeing how different people finish their crocheted pumpkins off, my favorite way is to make a button stem.   I have  a lot of old buttons that are perfect for this.  After wiring a stem of buttons together I just stick the wire ends through the center of the pumpkin and twist the ends together, tucking any sharp edges up into the fabric to finish it off.   See my button stem tutorial here.

A simple crochet project that's fun and satisfying.  Visit Ginny's Yarn Along to see what other knitters and crocheters are making and reading this week.


http://www.gsheller.com/2015/10/yarn-along-249.html


Tuesday, October 13, 2015

Summer's end...

I know it's been autumn for three weeks already, but it's felt like summer.  Until recently.

With the wonderfully chilly nights we've had lately, and knowing autumn's first frost is around the corner, it was exciting to still find one of late summer's delights.  As I watered my mums recently, I noticed movement amongst the blooms.  I looked closely, and then suddenly saw a little (well, actually a fairly big) grasshopper moving along the tops of the flowers.


Evidently, neither the shower nor my excitement bothered him as he stayed pretty much in the same spot until I could get my camera from inside the house.   He patiently (or maybe warily) posed as I snapped away.  Finally sensing, I suppose, that I was no threat, he slowly crawled on to new blooms until he eventually disappeared again.   I hope he found the water as refreshing as I found the droplets delightful resting on his back and head.


The older I get, the more I notice how amplified everything is in the early weeks of fall.  The warmth of the sun seems to caress my skin instead of burning it.  The insects have become large and beautiful.  The sense of changing weather hangs heavy in the air...  Even the sky is bluer. 

I find late summer/early fall a season of anticipation.  The anticipation of the last cutting of flowers, ...putting the garden to sleep,  ...the deep chill that's coming, ...the blazing colors getting ready to burst upon us, ...and the end of the cicadas' songs.

This autumn, in particular, I am mindful of the season of life I'm in.  Age-wise, I'm definitely in my autumn season.  My chicks are fast flying the coop and I am once again getting my bearings on what a new stage of life means.  My bearings have calibrated slowly, but I've recently become free in spirit that I don't have to have all the answers.  Now it seems enough to feel like I'm finally asking the right questions.

When looked at in light of what God may have in store for me, this stage of life holds an optimism of perhaps a bursting forth with new vigor - if not physically, certainly spiritually, emotionally, and relationally. 

This autumn, perhaps more than in the past, I eagerly anticipate all things colorful and exciting.  Yet I daren't wish a moment of today away.  I don't wish away the fading flowers... the lingering, lazy bees and wasps...  the spiders' webs...  In the past I couldn't wait to be done with these things, and have it all cleaned up already.  This year I'm noticing them differently.  Savoring them.

The anticipation of the full blaze of autumn, every bit as much as the blaze itself, is a lovely too-short time.

Sunday, October 11, 2015

A pumpkin treat bowl...


Another busy week and not much crocheting to show, but yesterday I whipped up this little pumpkin treat bowl as part of a CAL on Ravelry. 

It's a simple pattern, but my pumpkin didn't come out perfectly round.  I noticed that around row 5 or so I was off a stitch and tried several times to redo it and fix the problem.  But I wasn't able to see where I might be going wrong. Frankly, I wasn't sure I was doing anything wrong and I finally decided I wasn't going to fuss with it anymore.  And then the lid didn't fit like I wanted, so I adapted it - and I adapted the leaf (check out my project notes if you're curious about any modifications I made.)  While this little pumpkin bowl wasn't difficult, frankly...it wasn't my favorite thing to crochet.


In the end, though, it's kind of cute.  And it fits my category of something whimsical (in my YOP list), so I'm going to be happy with it, knowing pumpkins (real or not) have a short shelf-life here and it will be packed away with other fall décor before the snows fly (hopefully, long before).  For Wednesday's Yarn Along I plan to show my favorite crocheted pumpkins.  These are easy peasy and come out right every time.  Come back and see!

To check out what other Year of Project members are up to this week, visit our thread on Ravelry.  

http://www.ravelry.com/


If any of the links in this post are inaccessible, you'll need a free Ravelry membership.  Just click the ravelry button above and sign up!